Bell Beast Guide: Unlock Fast Travel Mount
Master the Bell Beast boss fight to unlock fast travel in Hollow Knight Silksong. Learn to counter double-damage attacks, perfect pogo timing, and claim your mount for exploring Pharloom.
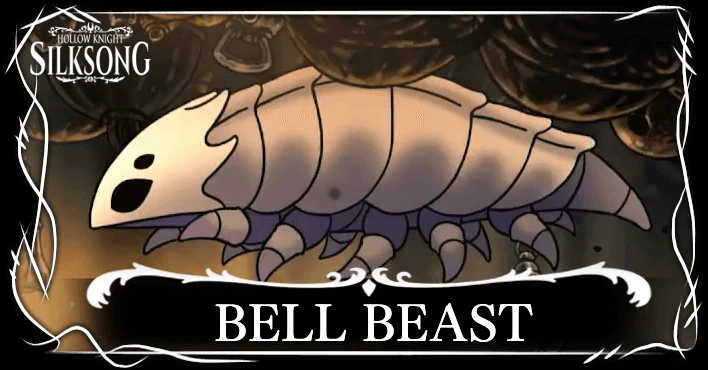
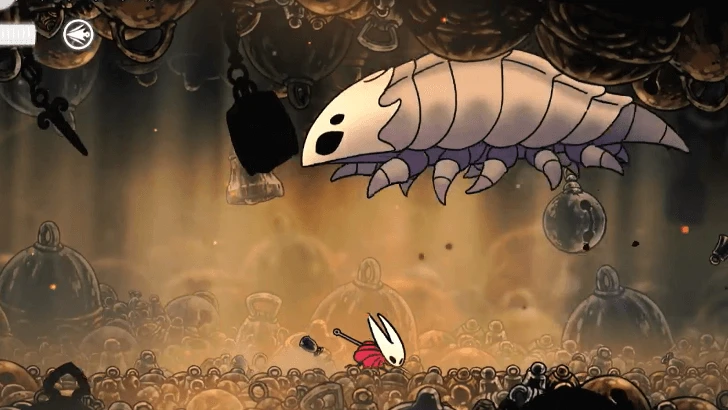
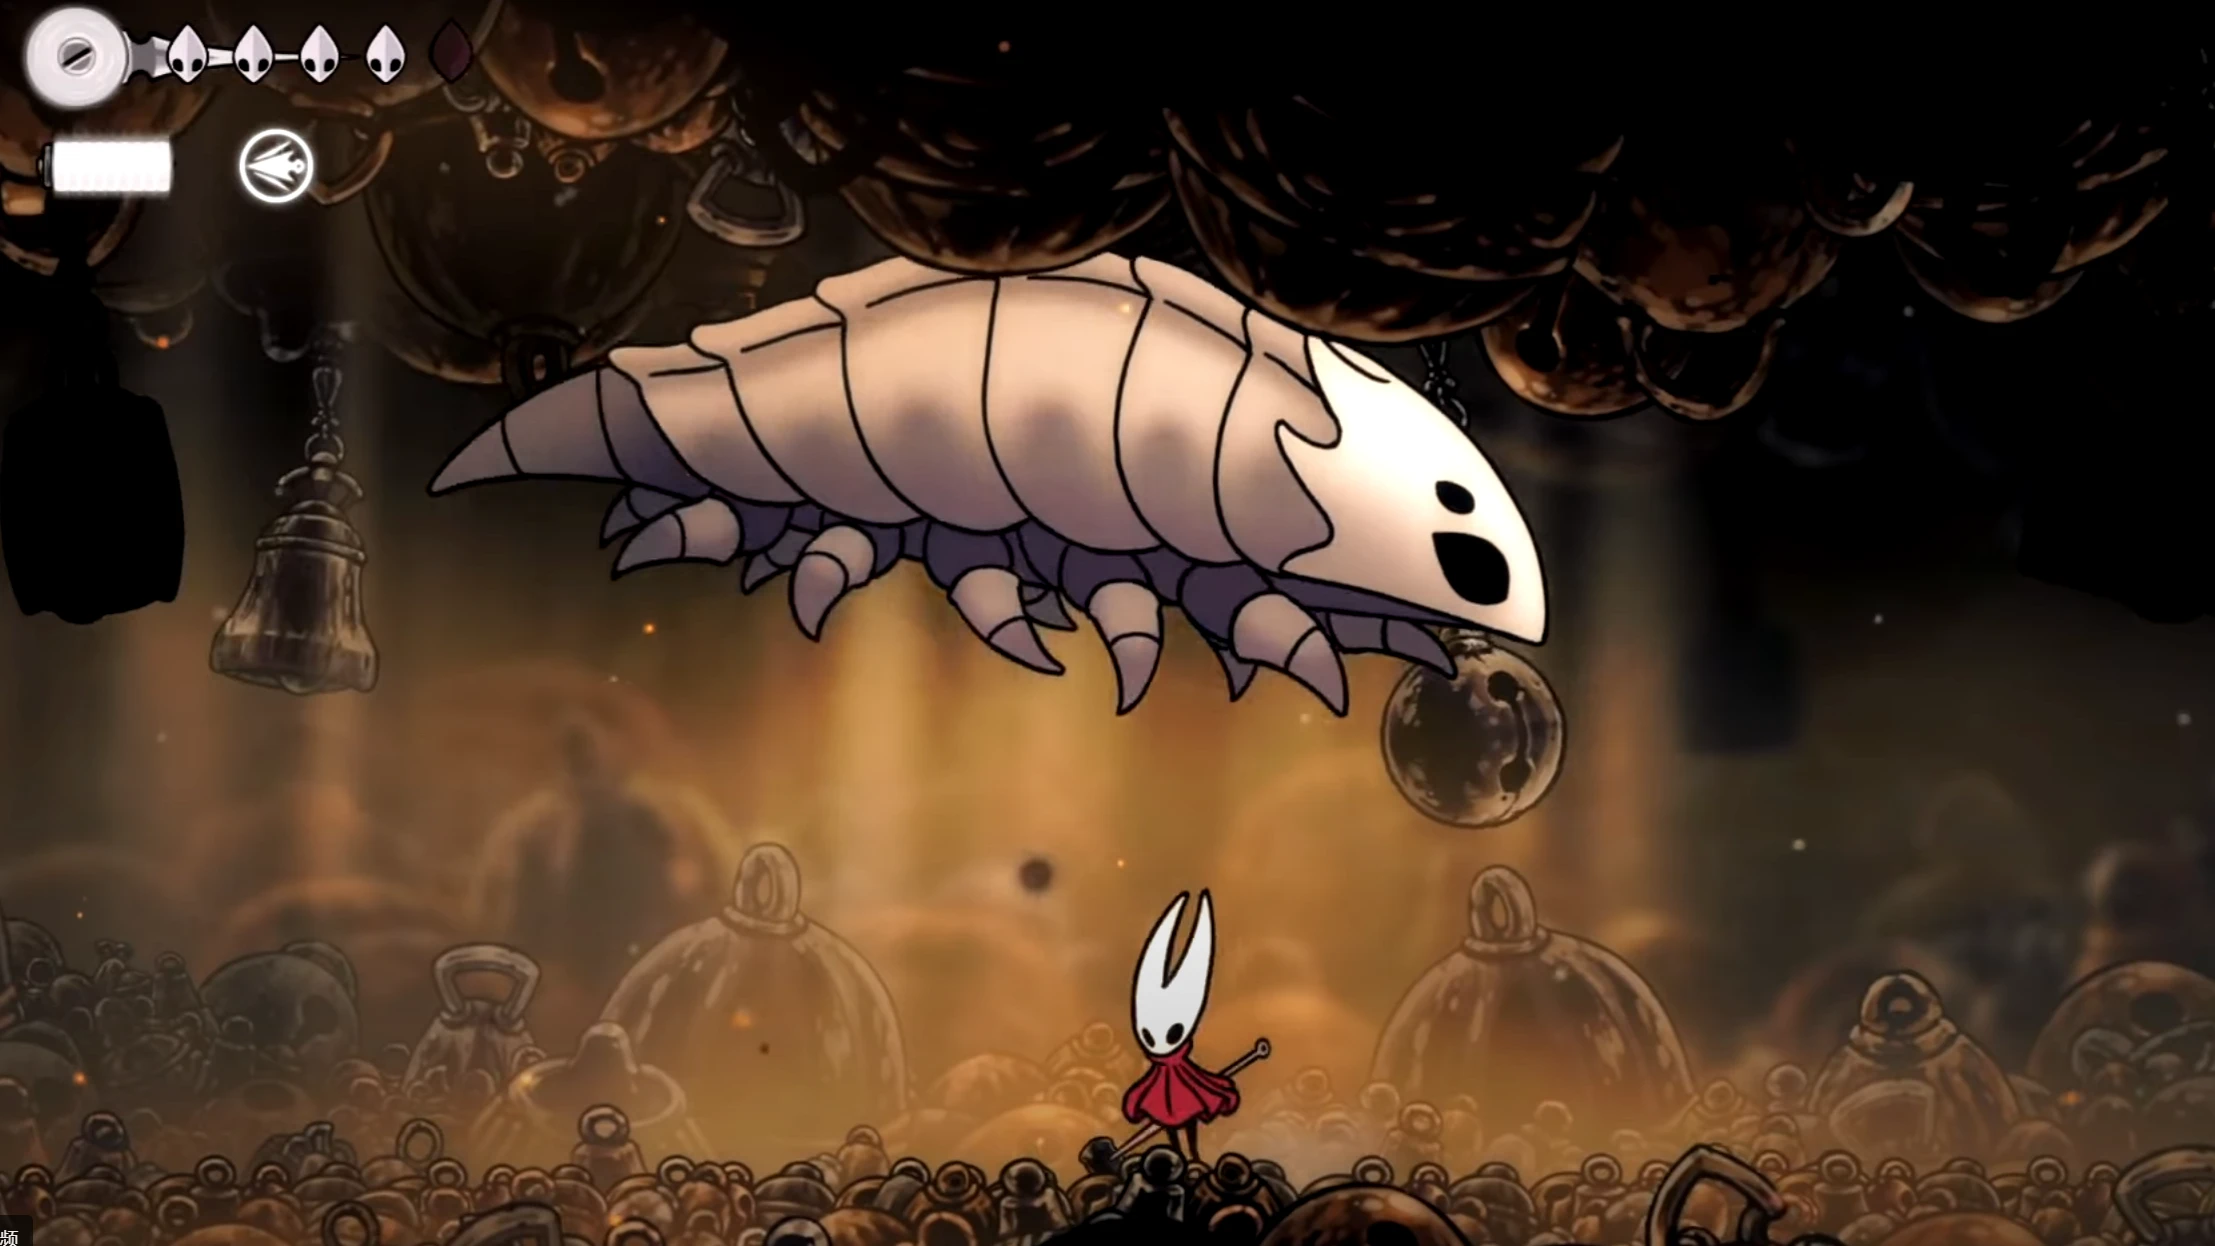
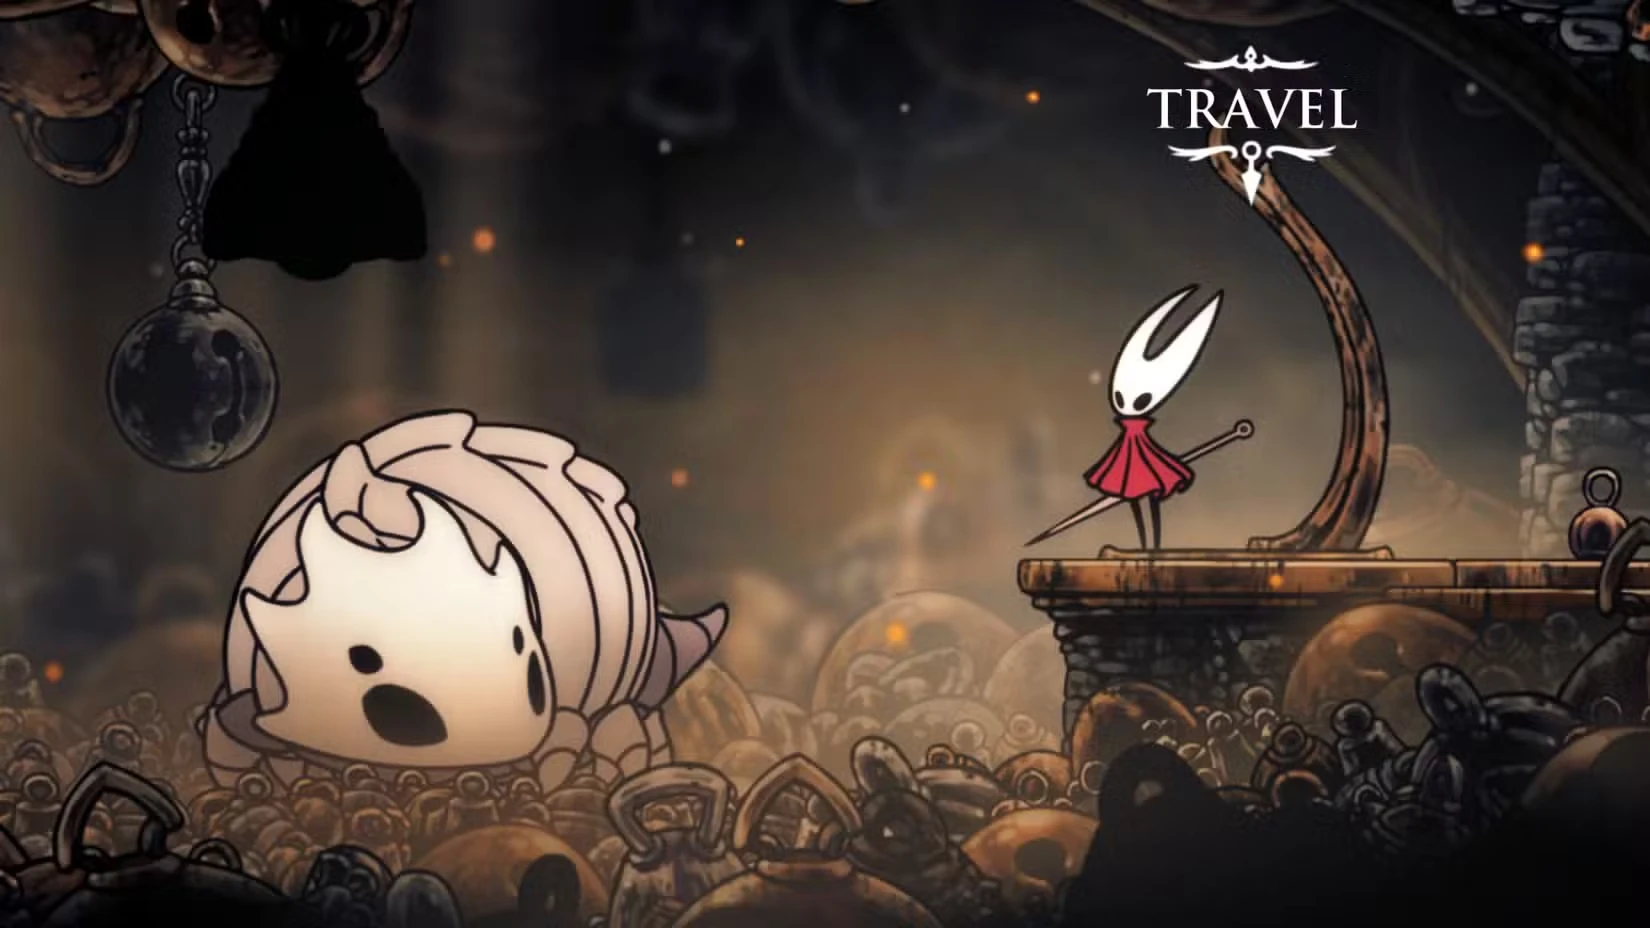
The Bell Beast in Hollow Knight Silksong is much more than just a boss fight—defeating it unlocks the entire fast travel system for exploring Pharloom. Located in The Marrow, this creature becomes your faithful mount once freed and conquered.
🔔 Why Bell Beast Matters
Critical Progression Boss: This isn't optional—Bell Beast unlocks the Bellways fast travel system, transforming how you explore the world.
Key Stakes:
- Fast travel unlock - Essential for efficient exploration
- Double damage attacks - All hits deal 2 masks instead of 1
- Three-phase escalation - Gets progressively more dangerous
- Pogo practice arena - Perfect place to master diagonal pogo mechanics
📍 Prerequisites & Location
Required Abilities
Must Have: Silkspear ability (obtained from Mosshome)
How to Get Silkspear
- From Shakra's location, go left then up to Mosshome sub-zone
- Navigate trap-filled rooms until you reach the Weaver symbol
- Interact with the plaque to unlock Silkspear ability
- Equip Silkspear at any bench
Finding Bell Beast
Location: The Marrow, northernmost point (above Shakra's first location)
Initial State: Trapped in spider silk - unusable until freed
Liberation Process:
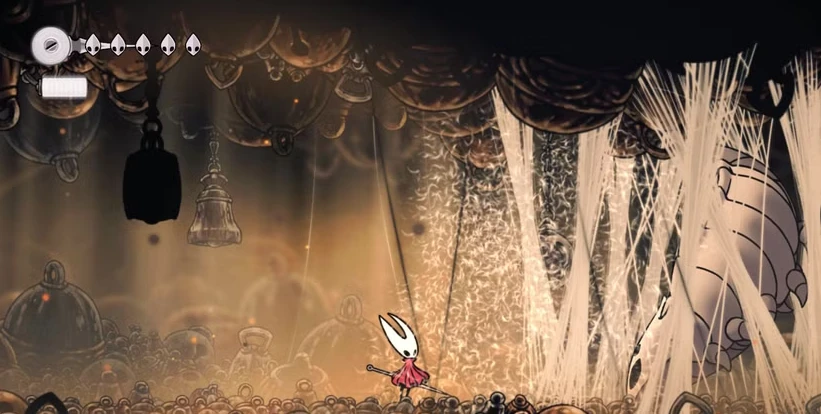
- Use Silkspear to break all silken bindings simultaneously
- Bell Beast becomes agitated and immediately starts fighting
- No opportunity to heal between freeing and fighting
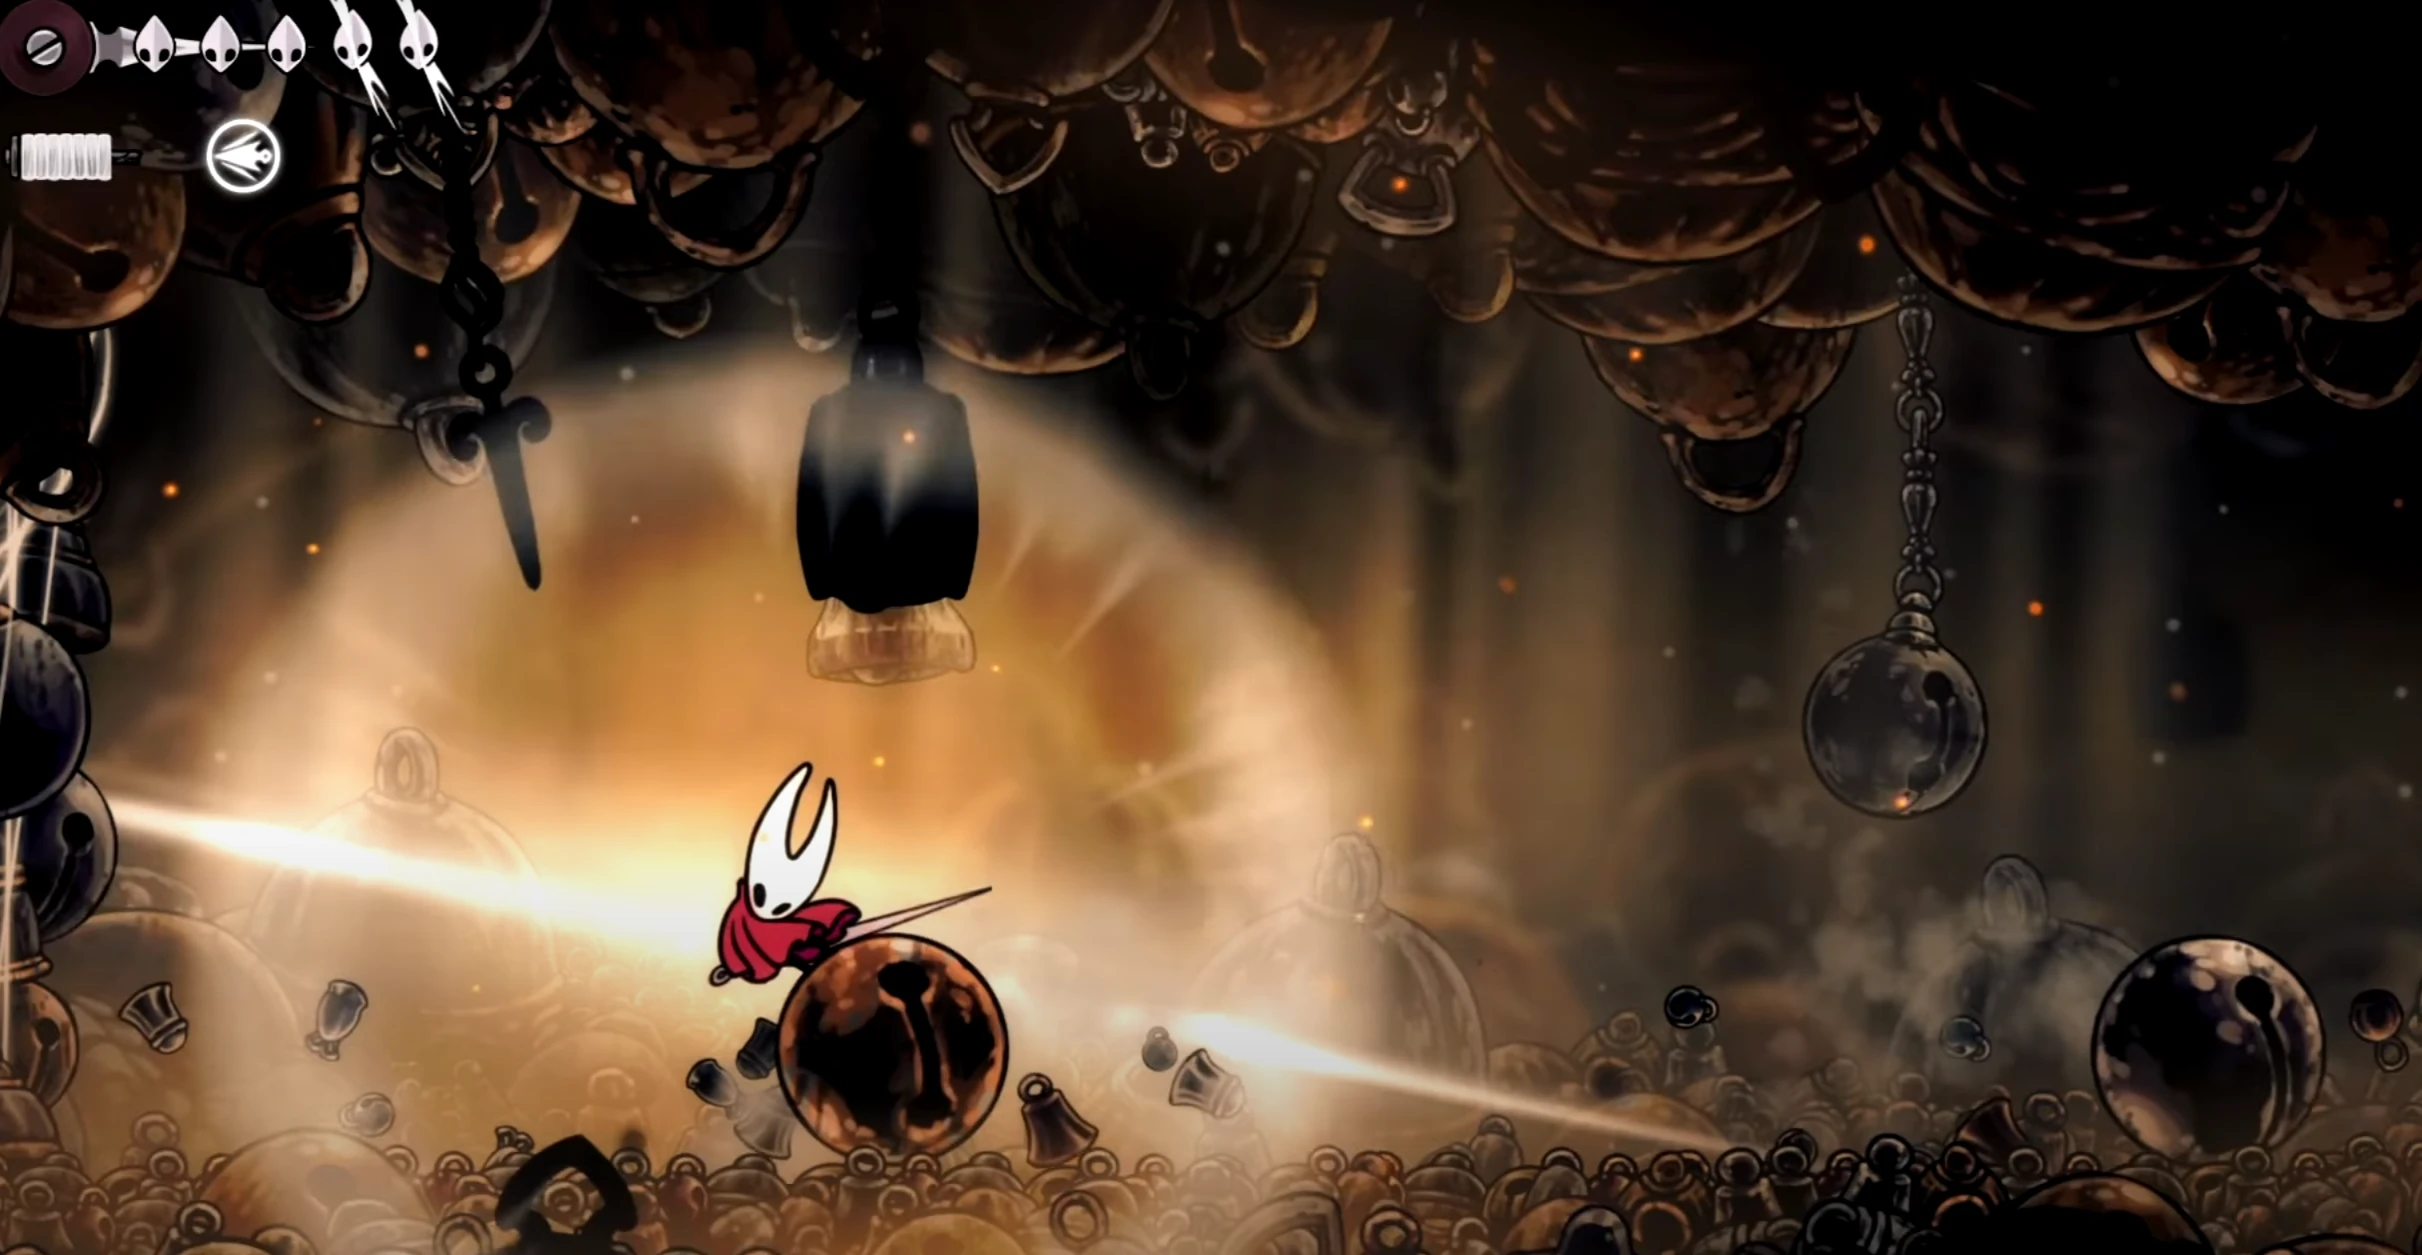
⚔️ Combat Overview: Double Damage Warning
☠️ CRITICAL: Every Bell Beast attack deals 2 masks of damage instead of 1
Result: With base health, this becomes a 3-hit kill boss fight
The Three-Phase Structure
Phase 1 (100%-67%): Basic attacks, ground charges, air leaps
Phase 2 (67%-33%): Adds falling bells from ceiling
Phase 3 (33%-0%): Arena shaking + random ceiling bells after every attack
🎯 Phase 1: Learning the Patterns
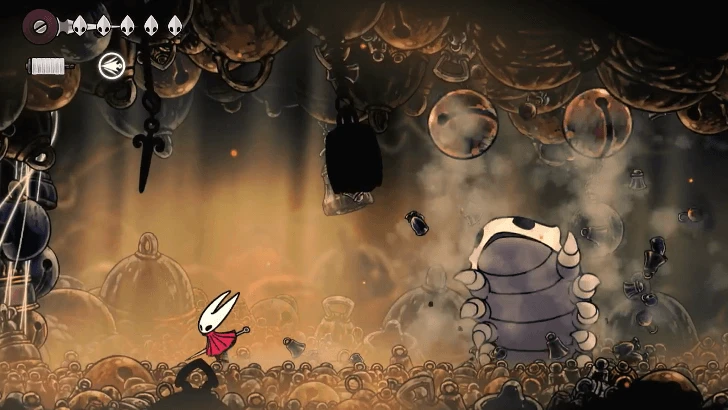
Attack 1: Ground Charge
Telegraph: Ground shakes, Bell Beast appears on left or right
Attack: Charges across the entire arena
Counter: Jump above and pogo on its back as it passes underneath
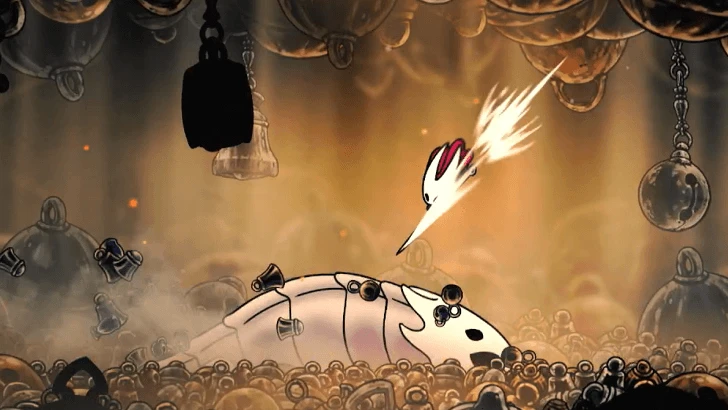
Perfect Pogo Timing:
- Jump early when you see the telegraph
- Attack diagonally downward (not straight down)
- Bounce off its back for free damage and safe positioning
- Land behind it automatically after the bounce
Attack 2: Flying Leap
Telegraph: Bell Beast rears back slightly
Attack: Arcs through the air toward your position
Counter Options:
- Run underneath and slash its belly (risky but rewarding)
- Back against wall so jump doesn't reach you, then attack its nose
Attack 3: Double Bell Toss
Telegraph: Bell Beast creates dust cloud in center, pops up
Attack: Tosses two large bells in opposite directions
Counter Strategy:
- Move to nearest wall when you see the dust cloud
- Jump over the rolling bell as it approaches
- Don't get caught in center - you'll be hit by both bells
Damage Potential: 4 masks if both bells hit you - instant death
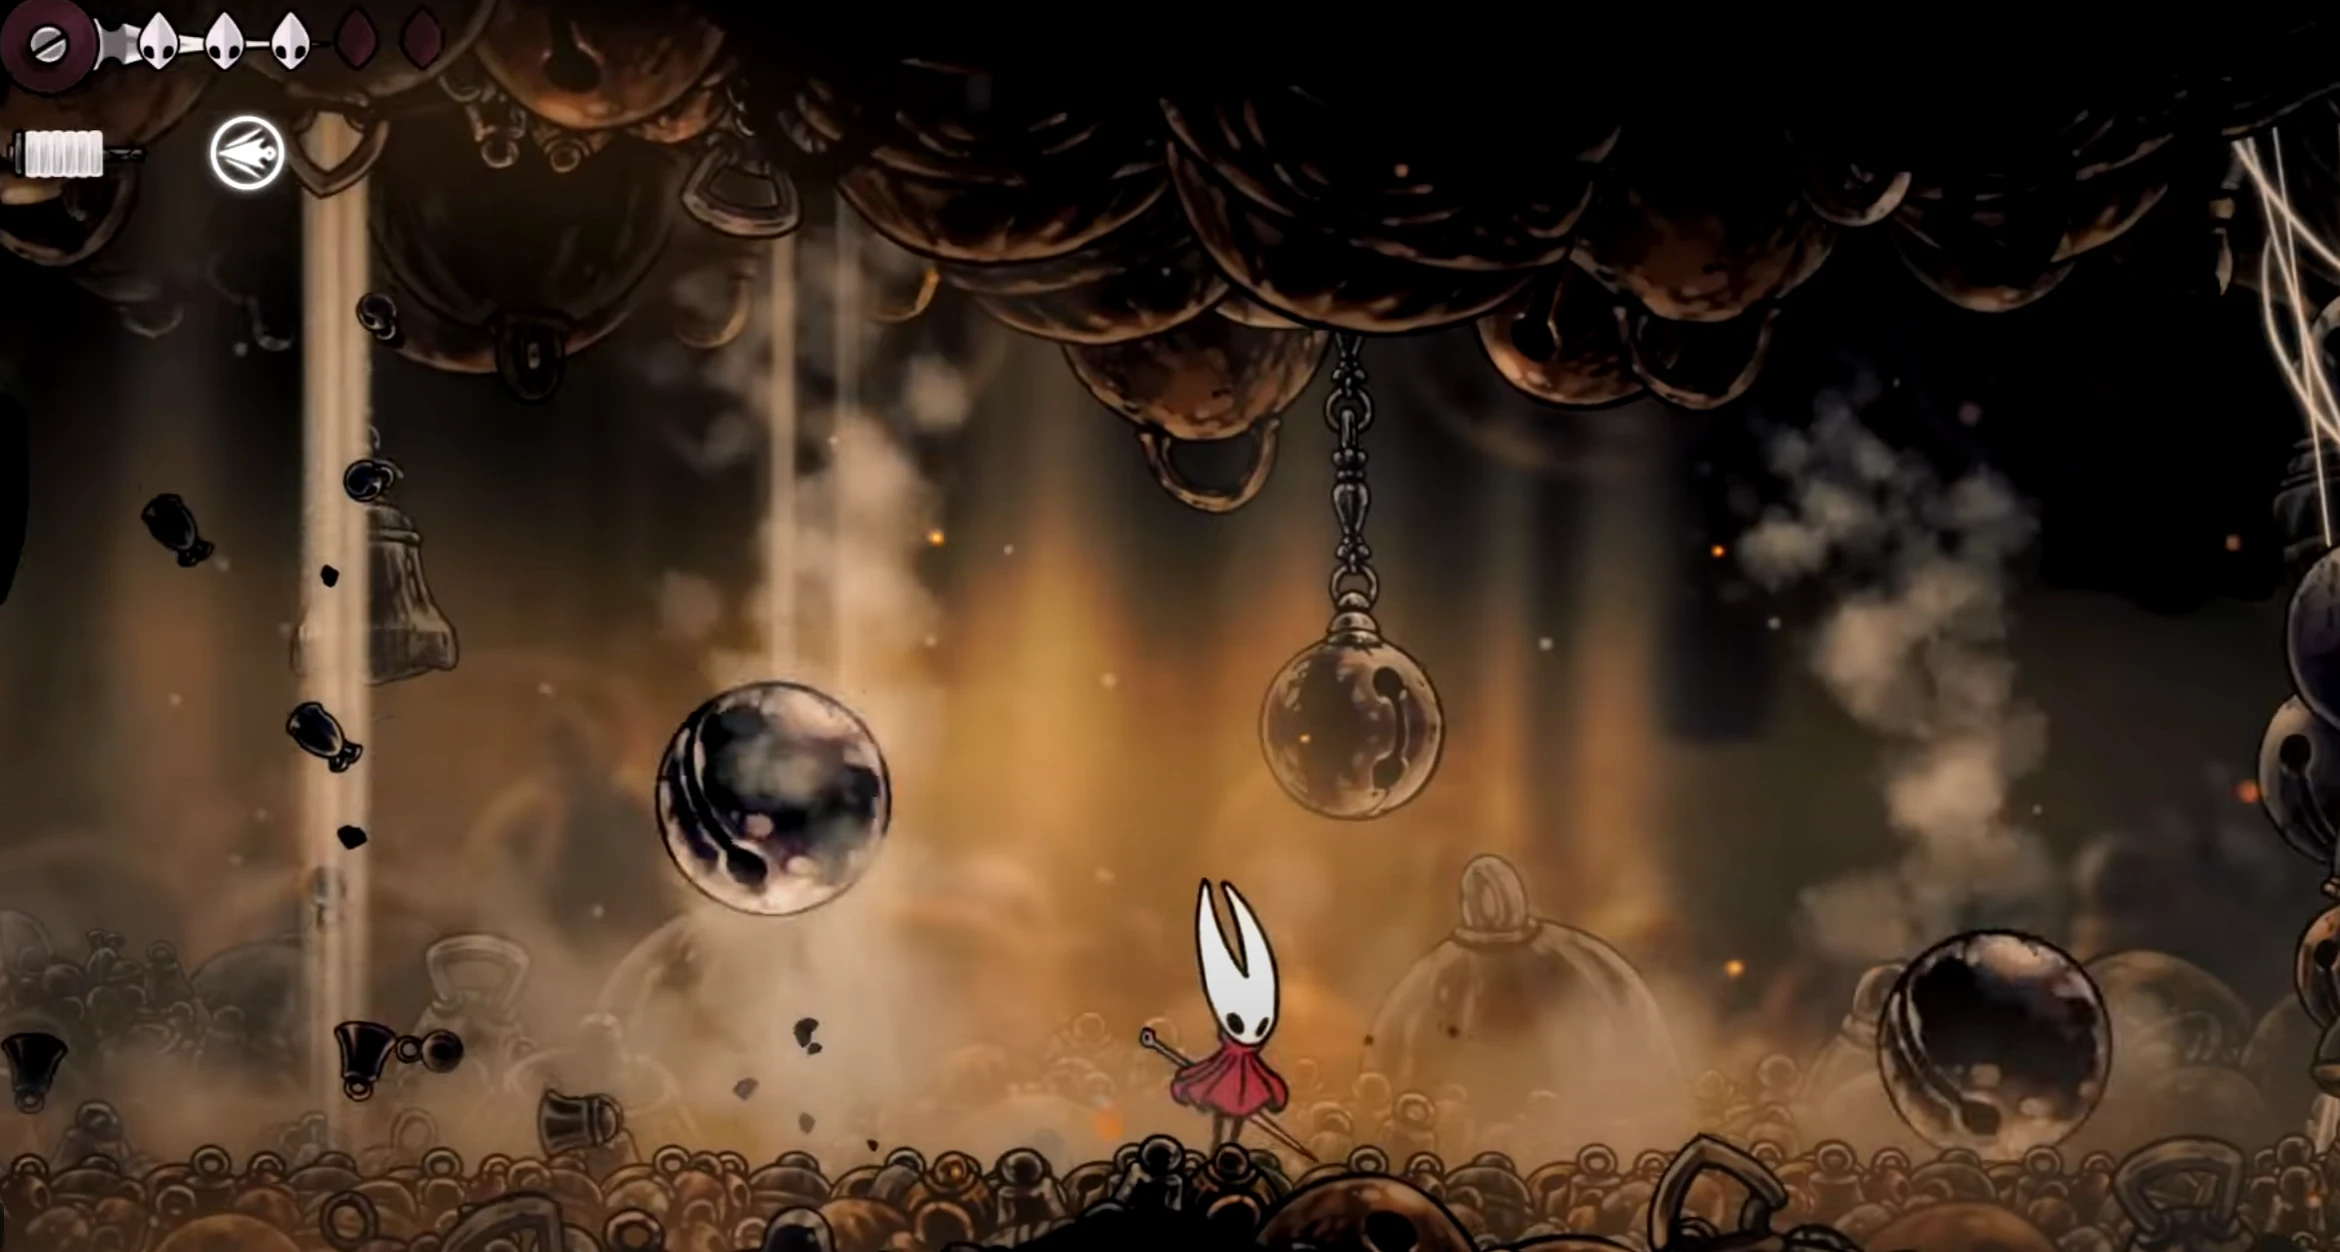
🔔 Phase 2: Falling Bells Hell
Trigger: Bell Beast roars, bells start falling randomly from ceiling
New Hazard: Ceiling Bells
Warning Sign: Dust trickles from ceiling before each bell drops
Damage: 2 masks per bell hit
Duration: Continues for the rest of the fight
💥 Phase 3: Maximum Chaos
New Mechanic: Arena violently shakes after jumping slams and bell tosses
Additional Hazard: Random third bell drops from ceiling after each attack
Survival Strategy
- Always watch for dust signaling falling debris
- Stay mobile - standing still guarantees getting hit
- Center positioning between attacks to react to any direction
- Never panic-jump - accidental contact with falling bells is deadly
🛡️ Winning Strategy
Core Combat Principles
1. Defensive Mindset
- Never rush the Bell Beast - let it come to you
- Patience over aggression - dodging is more valuable than attacking
- Attack only during Ground Charge and after Flying Leap
2. Positioning Priority
- Head to center after each attack sequence
- Avoid corners during Bell Burst attacks
- Watch ceiling constantly for dust markers
3. Perfect Pogo Execution
- Diagonal pogo strikes (not vertical)
- Jump early for maximum hit chance
- Use Bell Beast as practice for advanced pogo mechanics

⚕️ Healing Strategy
Golden Rule: Only heal between attack patterns, never during
Safe Healing Windows:
- After Ground Charge when Bell Beast is repositioning
- Before Phase transitions when there's a brief pause
- Never heal when ceiling bells are actively falling
Timing Warning: Healing takes longer than expected - ensure you have 2+ seconds of safety
🏆 Victory Rewards
Immediate Benefits
- Bell Beast becomes your mount for fast travel
- Bellways system unlocked - 10 fast travel points across Pharloom
- First major exploration upgrade in the game
Fast Travel System
How it Works: Bell Beast stations marked with three-chevron signposts
Activation Cost: 50 Rosaries per new Bellway
Function: Instant travel between discovered stations
Available Bellways:
- The Marrow (first station)
- Deep Docks
- Far Fields
- Greymoor
- Bellhart
- And 5 more locations...
💡 Pro Tips & Common Mistakes
✅ DO:
- Master diagonal pogo - this fight is perfect practice
- Stay patient - rushing leads to taking unnecessary double damage
- Watch dust markers religiously for falling bells
- Use center positioning to react to attacks from any direction
❌ DON'T:
- Panic during Phase 3 - stay calm and watch patterns
- Ignore ceiling hazards - falling bells will combo you to death
- Get cornered during Bell Burst attacks
- Attempt healing under pressure - you'll lose health and silk
🎪 Fight Progression Summary
Phase 1: Foundation
- Learn basic pogo timing on Ground Charge
- Practice safe positioning for Flying Leap
- Build confidence with the double-damage reality
Phase 2: Complexity
- Add ceiling hazard awareness
- Master the Double Bell Toss dodge
- Maintain calm under increased pressure
Phase 3: Mastery
- Handle multiple simultaneous hazards
- Perfect your positioning and timing
- Claim victory and unlock fast travel
🌟 Post-Victory: Your New Best Friend
Once defeated, the Bell Beast transforms from enemy to ally:
New Relationship: Your faithful mount across Pharloom
Travel Method: Ride between discovered Bellway stations
Exploration Impact: Dramatically reduces backtracking time
Story Significance: First major progression milestone
The Bell Beast fight represents more than just combat skill—it's your gateway to truly exploring the vast world of Pharloom efficiently!
Ready to explore more of Pharloom? Check our area exploration guides and advanced boss strategies for your next challenges.
Tags
Related Guides
Continue your Hollow Knight: Silksong journey with these carefully selected guides

Defeat the Hunter's March Guardian in Hollow Knight Silksong. Master hit-and-run tactics against this early game gatekeeper who deals devastating double damage with every attack.

Master the fight against Lace, the lightning-fast fencer in Deep Docks. Learn to counter her blindingly fast attacks, avoid the lava platform hazards, and claim victory in this skill check boss battle.

Master the fight against Moss Mother, the first boss in Hollow Knight Silksong. Learn her 3 attack patterns and win easily with our quick strategy guide.